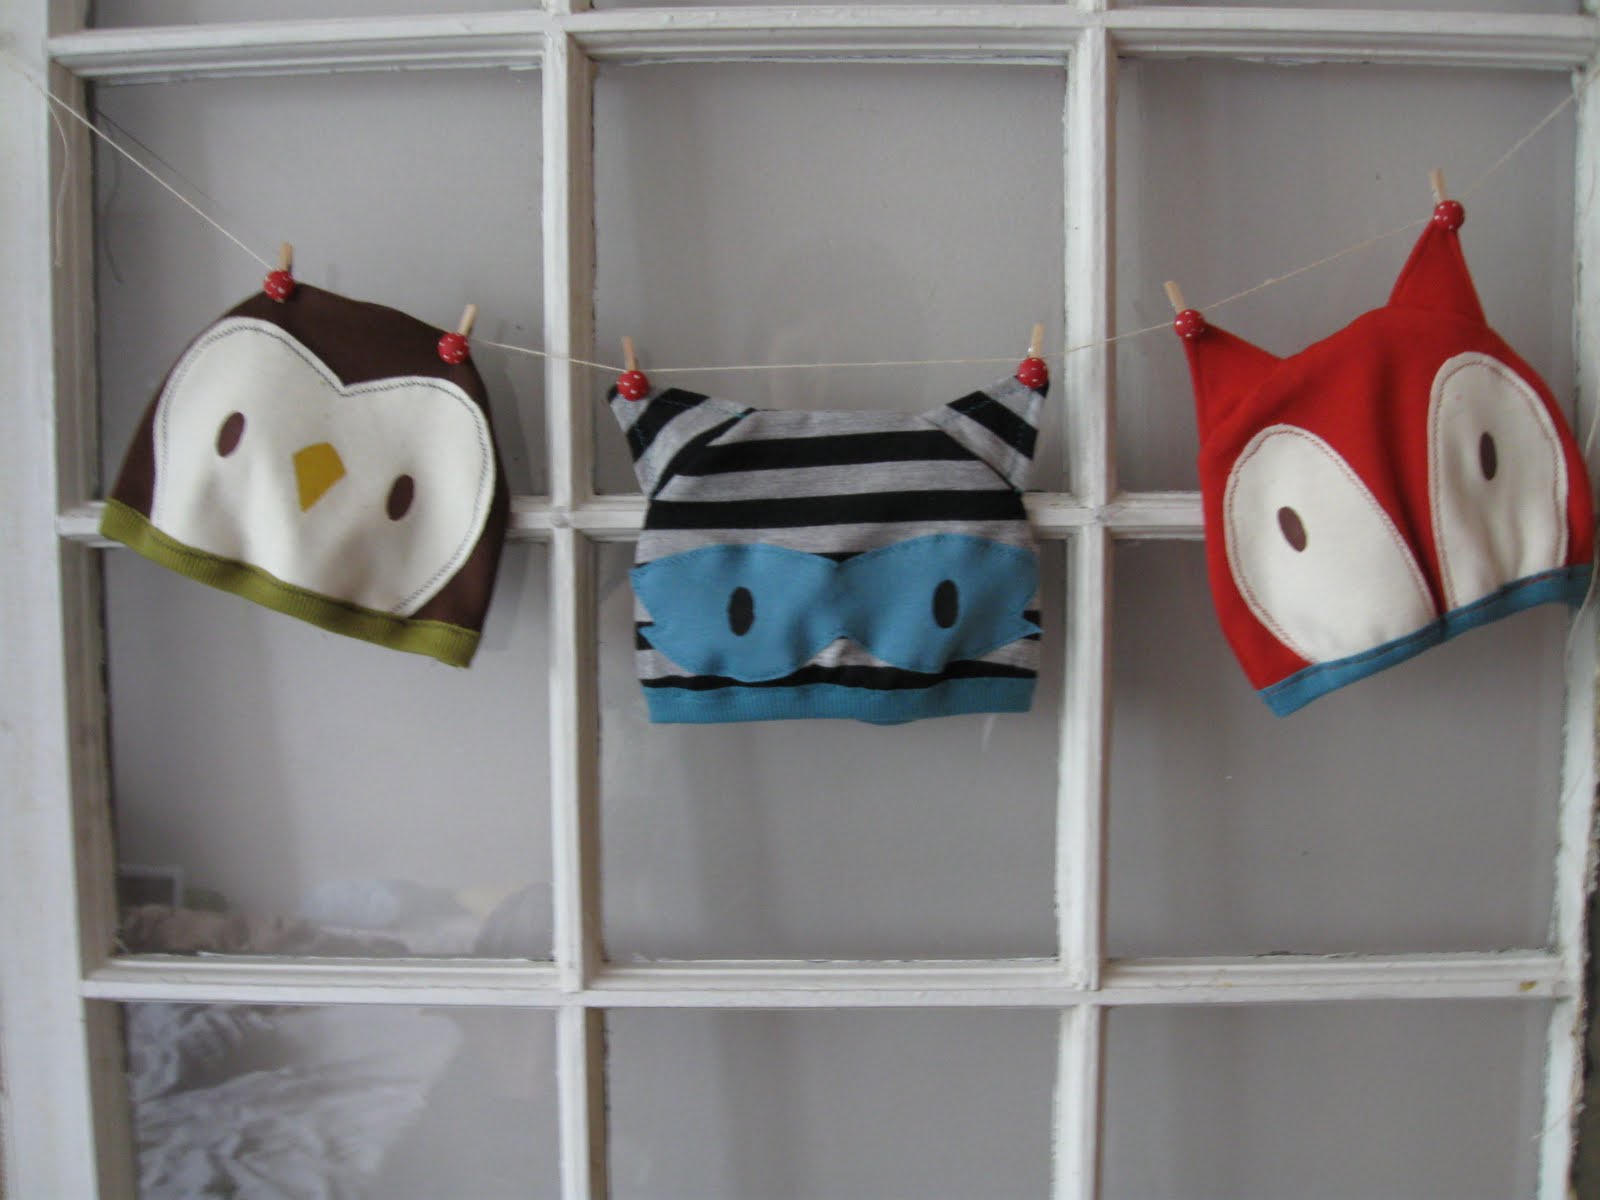
 The baby animal hat patterns are here! You can download the pdfs for the owl, the fox or the raccoon. When you print the pdf, make sure you select "none" in the page scaling drop down menu.
The hats are about size 6 mo but they stretch. If you're looking for a different size you could trace an existing hat or enlarge the pattern. It's my first pattern, so please be patient and don't hesitate to ask any questions. I'm not going to make a full blown tutorial, but the instructions are below. First of all, here's what you'll need:
-Less than 1/4 yard of cotton interlock knit, in coordinating colors. I like the thickness of interlock for these. Mostly it just needs to be something that won't fray. If you use a lighter weight jersey, old t shirt etc, you may need to use interfacing or extra layers on the ears to keep them from flopping over.
-Ribbed knit in coordinating color. Less than 1/8 yard.
-Either have matching thread or a coordinating color if you want to get decorative with it, this project is pretty topstitch heavy.
-Freezer paper and fabric paint or extra coordinating fabrics if you choose to applique the features instead.
The basic steps are as follows
1- Wash, dry, press your fabric. Cut out pattern pieces and your freezer paper stencil.
2- Applique, paint, sew buttons or stencil the eyes (and beak for the owl) onto the face pieces. I used freezer paper stencils and I included my stencil design in the pattern. If you've never used freezer paper to stencil, I highly recommend it. Here's one of many great tutorials.
3- Let your paint dry fully, and then heat set it. Be sure to use an ironing cloth or scrap of fabric to protect your iron.
4- Topstitch the face pieces onto the front of the hat. Use a zig zag, serger or some other stitch that a) will stretch and b) looks decent as this will show.
5- Sew ribbing to the bottom edge of both sides of the hat. Here's my ribbing tutorial, if you've never used it. (For the owl hat, skip to step 8)
6- Take 2 ear pieces, right sides facing, and sew the top 2 sides of the triangle, leaving the bottoms open. Turn right side out and topstitch. Repeat with the other ear.
7- Pin ears to front side of hat, pointing down, right sides facing. Take your time and make sure you like the ear placement.
8- Pin both sides of the hat together, right sides facing, and sew. Trim any scraggly edges and turn right side out.
 Once again, I'm sorry for the delay on these. It's been a comedy of errors for sure. But I appreciate your patience and interest so very much. If you do make anything from these patterns, and especially if you blog about them, I'd love to be credited for the inception. And definitely leave me a link so I can check out your creations! Thanks!
I have just printed the owl pattern to make for a friend's new baby boy...it will probably be a while before I get a chance to sit down and make it though! I am so glad you made these patterns...you really are very talented! I will let you know when I get around to making it. Thank you very much.
ReplyDeletegreat job, I can't wait to make one or two for my new nephew. :)
ReplyDeleteVery cool! Thanks for sharing!
ReplyDeleteSo cute! I going to look for old T-shirts today!
ReplyDeleteThis is soooo awesome, thank you very much! I must make the raccoon ASAP!
ReplyDeleteClair,
ReplyDeleteI cannot even begin to tell you how awesome you are! What lucky children.
lindsey johnson
thank you for posting the tutorial! i love these hats!!!...can't wait to make a couple for my little men :)
ReplyDeleteOh I am so happy you have a tutorial and pattern for these. I can't wait to try them!
ReplyDeleteso cute! I'll have to share for my mommy friends who have boys ;)
ReplyDeleteThanks so much for sharing. They are adorable. I just made some up, and can't wait to try them on a little baby head. Here's a link to the ones that I made: http://leafytreetopspot.blogspot.com/2011/08/sewing-for-baby-baby-animal-hats.html
ReplyDeleteThese are awesome and I loooove raccoons - thank you so much for sharing the pattern!! Woop Woop - very excited to make my little guy a hat now!
ReplyDeleteI just posted it to facebook. (: Awesome, awesome, awesome! Tooo cute! (:
ReplyDeletehttp://www.facebook.com/TLKDesigns
This is awesome! Thank you so much! My son's theme in his room is woodland creatures, so I'm in love! Thanks again!
ReplyDeleteI found this and it's just TOO cute!!! I'm pregnant and due in October and was looking for an Owl hat to sew for our 2nd boy!!! Can't wait to try it.
ReplyDeleteAlready made a raccoon hat and linked to your tutorial in my blog. Thanks again for this awesome idea.
ReplyDeletehttp://heidiinlederhosen.blogspot.com
Thank you all so much! I'm thrilled you all like them.
ReplyDeleteI love this! I just pinned it and had like 20 repins in 15 minutes, lol. :)
ReplyDeleteThis is the cutest things EVER!!! Saw it on pinterest.
ReplyDeleteGREAT JOB! these are so cute and what a wonderful spring board for more inspiration! I have printed and will make them soon!
ReplyDeleteSuper CUTE!!! Thanks for sharing!
ReplyDeleteThan you for posting these patterns! I just stumbled across these this morning. I printed them immediately and I am going to get fabric this afternoon.
ReplyDeleteWe're expecting our first baby in August and we're doing a forest themed nursery. I plan on making these hats newborn size, with coordinating diaper covers, for our first photo session!
Thanks again! :)
I LOVE YOU!!! FOr this
ReplyDeletethank you! great tutorial :)
ReplyDeleteawsome this are just to DARN cool.............. love them thank you so much for sharing this..Rose
ReplyDeleteI love your hats, I'm using your pattern as a jumping off point for a bunny hat for my daughter's Halloween costume. Thanks for sharing!
ReplyDeletegracias gracias ¿como seguirte en blog?
ReplyDeleteThanks for the patterns and inspirations! They will be turned into cute baby gifts!
ReplyDeleteThese hats are so cute! We wouldlike to present them on our blog http://www.stoffkontor.eu/blog/cat/1/Tutorials/ and translate them into german if this is okay for you?
ReplyDeleteLovely. Great tutorial.
ReplyDeleteCan someone help me resize these for 20-somethings? I'm not sure I can up-size the pattern well, but I can follow a set of instructions with measurements of 'make x piece so many inches' and 'make y piece this size', and use that to re-draw or re-size the pattern to the new specifications.
ReplyDeleteWoo these are beautiful hats, love the designs and the patterns , will definitely gonna buy this for my son :)
ReplyDeleteThis comment has been removed by the author.
ReplyDeleteThen fold it in half to create the wings. AnimalHeadGear.com :: The Best Animal Hats Online offers some in-depth insights on FAQ.
ReplyDeleteHey, such a cute hats! Thanks for Posting!
ReplyDeletePhone number for Avast Antivirus
McAfee Support Phone Number
Norton Antivirus Phone Number
AVG contact number
webroot customer service Phone number
kaspersky customer service Phone number
bitdefender support phone number
Malwarebytes Customer Support
Your sweet Baby Animal Hats Tutorial and Pattern are greatly appreciated. Your site is a great source for inspiration when crafting. Finding inspiration for sewing gorgeous hats that delight children is like unearthing a creative "doubledownpromocodes" treasure vault.
ReplyDelete